HR
This has one menu option: Positions and is available to those with relevant security settings to access kiosk.
Positions shows you the structure and positions within the organisation. All of this will have been set up in payroll previously, so this area can be used for minor additions or adjustments. We recommend that maintenance of HR Positions and Framework is undertaken within HR3 payroll, rather than via kiosk. It is better to use HR in kiosk as a view of data only.
By default the only Position shown in the main panel is the top level position within your company.
Expanding the Positions Hierarchy
There are two options for expanding:
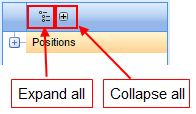
Click  to the left of Positions, then for each of the relevant positions, continue clicking its Expand button until you locate the position required.
OR
Click the Expand all button to display or hide the entire hierarchy of Positions in the centre panel:

The Collapse all button will revert the whole centre panel to display Positions only.
Note: With Positions highlighted in this panel, you will see there is an Add New button at the top of the main panel. While you may click the Add New button to create a new position within the Company structure, HR3 recommend that this type of action is performed within HR3pay. Please see the relevant instructions within HR3pay Help or the User Guide for more information on this process.
Add a New Property Item to an Existing Position
This is an example of a minor adjustment, and the instructions also apply to Skills, Training, Events, and Documents.
- Locate the required Position, then click Edit.
- View the Incumbent(s) tab to ensure you are adding the item to the correct Position Incumbent
- Open the Property tab, then click Add New
- Complete the following information as appropriate:
| Field | Explanation |
|---|---|
| Property Type | From the drop down list select the Property type this record relates to, or select <<Add New>> to create one as you work. |
| Property |
This list will display only those properties which have been linked to the selected Property type. If this is a new property, select <<Add New>> to create it as you work. Any notes which have been defined in the Validation Tables for the selected Property Type are displayed in the grey box. |
| [Note] | A note about the item will display if one has been entered in the Property table. |
| Description | Enter a generic description for the item. This is optional. |
